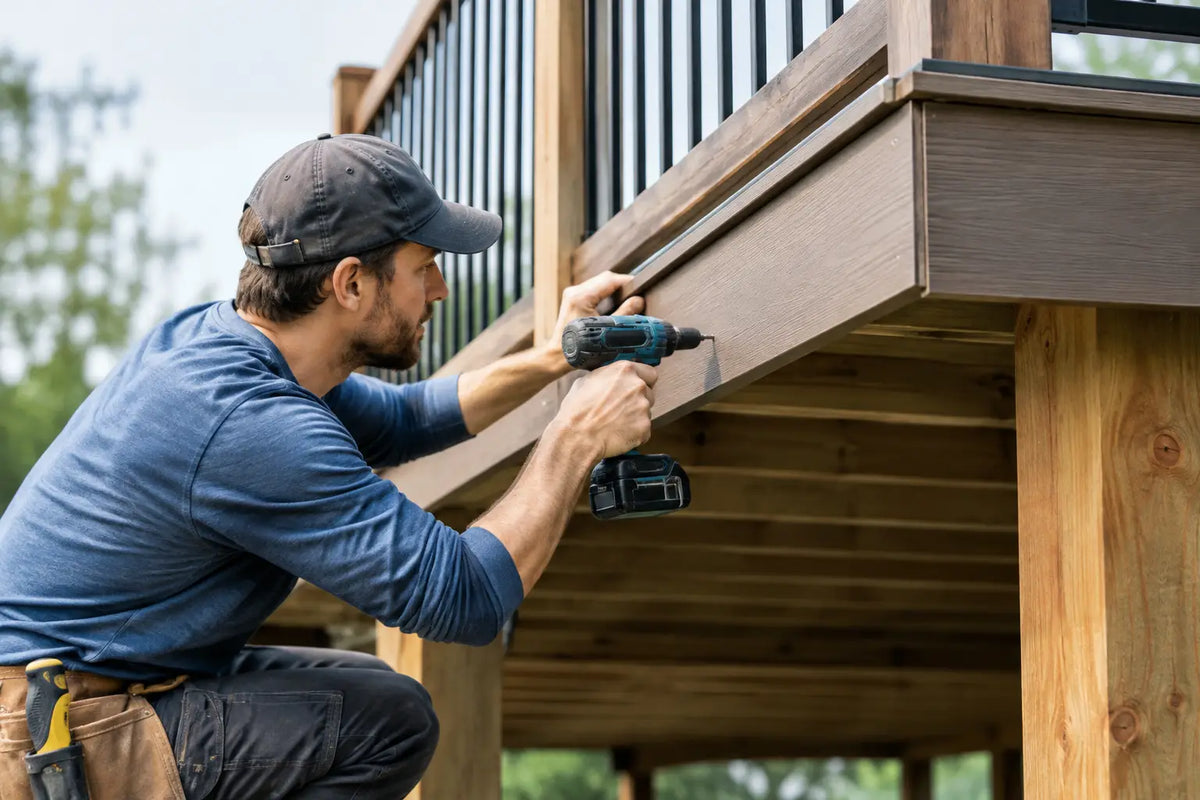
The deck surface may be the part everyone notices first, but the edge is what makes it look finished. To install decking fascia boards neatly, treat them as the final design detail, not an afterthought. Straight lines, consistent spacing and well-placed fixings turn an exposed frame into a clean, premium-looking garden feature.
Fascia boards cover the outer edge of your deck and conceal the joists beneath. They are especially effective with composite decking, where a matching border creates a smart, low-maintenance finish that suits contemporary patios, garden rooms and entertaining spaces. The fitting itself is manageable for a confident DIYer, but success depends on preparation and allowing for natural movement in the boards.
Start with a straight, supported deck edge
A fascia board can only look as neat as the frame behind it. Before fitting anything, check that the outside joist or rim board is straight, secure and sitting at a consistent height around the deck. A wavy frame will show through in the finished fascia, however carefully you cut the board.
Use a long straightedge, spirit level or taut string line to spot high points, dips and corners that are out of square. Correct these before you begin. If your decking boards overhang the frame, decide on that overhang first, then fit the fascia underneath to create an even shadow line.
It is also worth checking that the fascia will not trap water against the subframe. Composite decking is low maintenance, but the structure below still needs ventilation and drainage. Keep drainage routes clear and avoid sealing every gap around the edge.
Choose the right fascia depth
Measure from the underside of the deck board to the bottom of the outer frame. This tells you the depth of fascia you need. A board that is too shallow leaves the frame exposed; one that is too deep can sit in contact with the ground, paving or soil, where dirt and moisture will collect.
Aim to leave a small clearance beneath the fascia. The exact gap depends on the site and surface below, but it should be enough to prevent the board rubbing on the ground as temperatures change. On a sloping garden, measure at several points rather than assuming the deck height is identical all the way along.
Plan the layout before you cut
Lay the fascia boards alongside the deck first. This simple dry run helps you decide where joins will fall and avoids a narrow offcut at a highly visible corner. Where possible, position board joints over solid backing so both ends can be fixed properly.
Long, uninterrupted runs look best, but joins are often unavoidable. Place them in less prominent areas where practical, and keep the joint line consistent with the spacing used elsewhere on the deck. If the boards have a directional grain or wood-effect finish, check that every piece runs the same way before cutting.
For outside corners, you have two tidy options. A butt joint is simpler: one board runs to the corner and the return board meets it squarely. A mitred joint can look refined when cut accurately, but it needs more care because composite material expands and contracts. For most DIY projects, a well-supported butt joint with an even gap is the more forgiving choice.
Measure carefully and cut cleanly
Measure each section individually, even when two sides appear to be the same length. Garden decking is rarely perfectly square, and small differences become obvious on the front edge. Mark your cut line clearly, then check it against the deck before using the saw.
A fine-tooth blade designed for composite or wood-plastic materials will produce the cleanest result. Support the board fully while cutting so it does not vibrate, and let the blade do the work rather than forcing it through. A rushed cut can leave a rough edge that catches the light and makes an otherwise smart installation feel unfinished.
After cutting, lightly remove any burrs with fine sandpaper if needed. Do not aggressively sand the face of a composite fascia board, as this can alter the finish. Wipe away dust before fitting so it does not get caught between the board and the frame.
Allow for expansion gaps
Composite fascia boards expand and contract with changes in temperature. That movement is normal, particularly on a south-facing deck that receives strong sun. If boards are fitted too tightly, they can bow, push at corners or place stress on fixings.
Follow the spacing guidance supplied for your chosen board, as requirements vary by product and board length. As a general fitting principle, leave a controlled gap at board ends and joins rather than forcing boards tightly together. The same applies where fascia meets a wall, post or step.
Do not guess based on timber decking habits. Composite materials behave differently, and the manufacturer’s fitting guidance should always take priority over a general rule of thumb.
How to install decking fascia boards neatly with fixings
Hold the first fascia board in position and use packers or offcuts underneath if necessary to maintain an even ground clearance. Check the top line against the deck boards before fixing. This first board sets the standard for the entire edge, so take a moment to get it right.
Use corrosion-resistant, colour-matched fascia screws where available. These keep the finish more discreet and are better suited to outdoor conditions than ordinary indoor screws. Pre-drilling pilot holes is usually the neatest approach, particularly close to board ends, because it reduces the chance of splitting, mushrooming or misaligned fixings.
Position screws in straight, consistent rows. Two horizontal rows are commonly used on deeper fascia boards, while a narrower board may only need one, depending on the product instructions and backing available. Keep each fixing a sensible distance from the board edge and avoid overtightening. The screw head should sit flush and tidy, not sink deeply into the surface or pinch the board so tightly that movement is restricted.
Work from one end to the other, checking the top edge every few fixings. If the board starts to drift, correct it immediately. Trying to pull a long fascia line straight after every screw is in place is harder and can leave visible stress in the board.
Support every join and corner
The neatest fascia installations have solid support wherever one board ends and another begins. Add blocking between joists behind each joint if the existing frame does not provide a fixing point. This prevents loose ends, keeps the faces level and stops a join opening up over time.
Corners need the same attention. Make sure both return boards have backing close to the corner, rather than relying on a single fixing at the very edge. If you are fitting fascia around steps, break the job into clear sections and keep the lines aligned from tread to riser. A clean, repeated detail looks intentional; uneven gaps make even expensive decking look rushed.
Where a deck has posts, pipes or awkward projections, make a cardboard template before cutting the fascia. It takes a few extra minutes but is far less wasteful than cutting directly into a finished board. Leave the required movement clearance around obstructions, then cover only where your chosen trim system allows for it.
Finish the edge without creating future problems
Once the fascia is fitted, stand back from several angles. Look along the length of the deck at eye level, then check corners from above. You are looking for consistent top lines, evenly spaced fixings and joints that do not distract from the overall design.
Clean off cutting dust and fingerprints with a soft brush or a mild cleaner suitable for composite materials. Avoid harsh solvents and abrasive pads, which can damage the surface. If a screw is visibly crooked, remove and replace it rather than hoping it will disappear once the furniture is in place.
It can be tempting to caulk every joint for a perfectly closed look, but this is rarely the right move with composite boards. Sealant may restrict movement, collect dirt and fail as temperatures change. Neat spacing is the better long-term finish.
Common mistakes that spoil a tidy fascia line
Most fascia problems begin with one of four shortcuts: fitting to an uneven frame, skipping expansion gaps, using poorly aligned screws or leaving unsupported joins. None of these issues is difficult to avoid, but all become much harder to correct after the deck is complete.
Another common mistake is fitting the fascia before checking the final deck-board overhang. The result can be a top edge that sits proud in places and recessed in others. Finish the deck surface first, establish the line you want, then use it as the reference point for the fascia.
Finally, do not mix unrelated colours or profiles unless that contrast is part of the design. Matching composite fascia gives the deck a built-in appearance, while a deliberate darker border can frame the space beautifully. Either approach works when it is planned. What looks less convincing is an edge chosen only because it was the nearest board available.
A neatly fitted fascia board does more than hide the structure. It gives the whole deck a deliberate, finished look - the kind of detail that makes a DIY garden upgrade feel ready for summer from the first step outside.