A socket is the detail that can make an otherwise smart PVC wall look unfinished - or properly fitted. The key to fit PVC panels around sockets is not forcing a panel behind a faceplate and hoping the cover hides everything. Measure carefully, keep the electrical accessory secure and finish the opening cleanly for a wall that looks crisp from every angle.
Start with electrical safety, not the panel
Before removing any socket faceplate, switch off the correct circuit at the consumer unit. Do not rely on the socket switch alone. Confirm that the circuit is dead using suitable approved testing equipment, or ask a qualified electrician to make the area safe before you begin.
A PVC wall panel adds thickness to the wall finish. Once fitted, the socket faceplate must sit securely against the new finished surface, without crushing the panel or leaving a visible gap. The wiring, terminals and back box must remain accessible and must not be covered with adhesive, sealant or loose offcuts.
If the existing socket is recessed deeply, the fixing screws are too short, cables are tight, or the back box feels loose, pause the installation. A qualified electrician can assess whether longer screws, an approved box extension or a different back box arrangement is needed. This is a small detail that protects both the finish and the electrical installation.
Never fit a panel over a socket faceplate, cut around a live accessory, or use the socket screws to pull an unsupported faceplate tight against thick cladding. The socket should feel firm, sit level and operate normally once refitted.
What you need to fit PVC panels around sockets
Have the panel layout planned before you reach for adhesive. It is far easier to place a joint away from a socket than to make two narrow, awkward cuts meet around it. For a clean result, gather your tools first:
- Tape measure, pencil and straight edge
- Fine-tooth hand saw, jigsaw or multi-tool suited to PVC
- Drill and small starter bit for internal corners
- Adhesive recommended for PVC wall panels, plus a sealant gun
- Safety glasses, gloves and a reliable step stool if needed
Measure the socket opening twice
Remove the faceplate carefully
With the circuit safely isolated, loosen the two faceplate screws and gently bring the socket forwards. Do not tug the cables. In many homes, there is enough cable to hold the faceplate clear while you take measurements; if there is not, this is a job for an electrician rather than a reason to pull harder.
Measure the position of the socket back box from a fixed panel edge, such as the left side and the bottom edge. Then measure the opening itself. Work from the panel you are about to fit, not from a distant wall, as small variations in wall width and panel joints can affect the final position.
Transfer those measurements to the back of the PVC panel. Mark the cut line clearly and check it against the wall before cutting. The opening should be large enough for the socket box and wiring arrangement, but small enough for the faceplate to cover all cut edges. A modest clearance around the opening is sensible - the faceplate is there to conceal it - but avoid an oversized hole.
Use a simple cut-out method
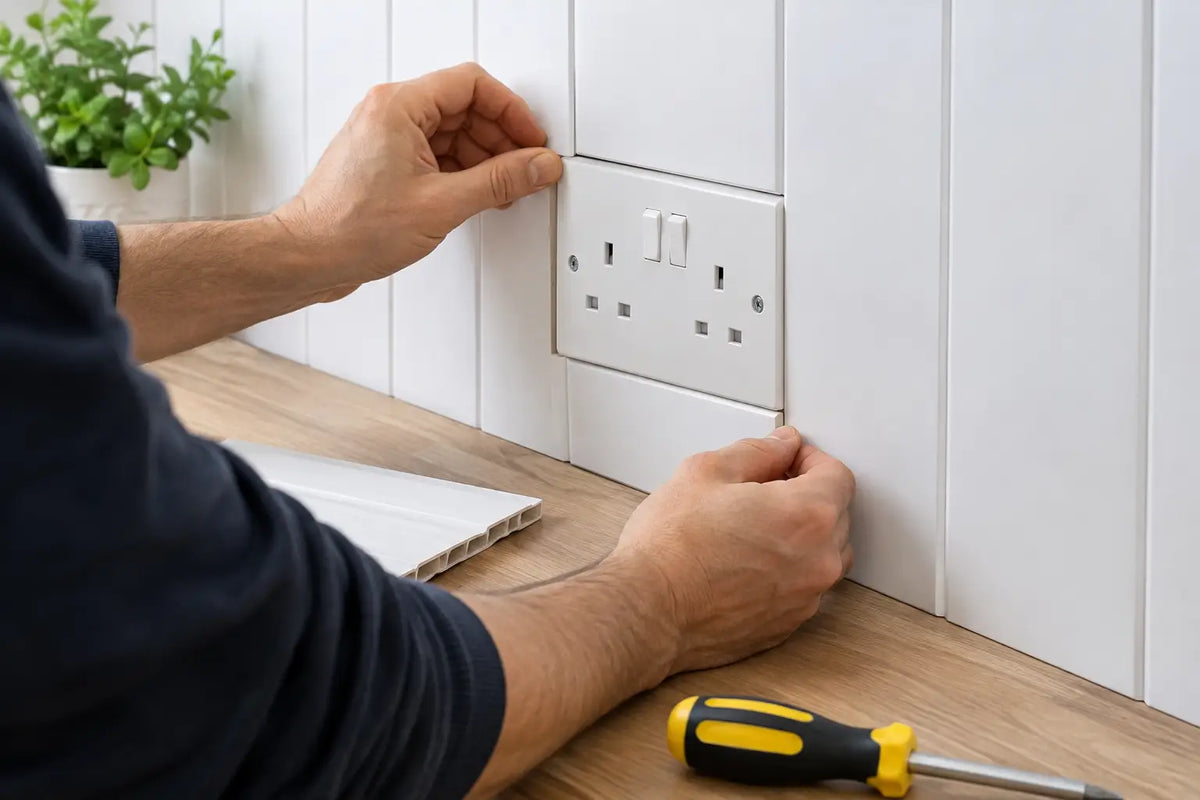
For a rectangular opening, drill a starter hole just inside each corner or use a multi-tool to begin the cut. Cut along the marked lines with the decorative face of the panel supported to reduce vibration. Dry-fit the panel before applying adhesive.
This test fit is worth the extra few minutes. Check that the panel lies flat, the opening lines up with the back box and the socket faceplate will cover the cut edge evenly. If the panel has a directional grain, marble effect or tile pattern, double-check its orientation before adhesive makes the decision permanent.
How to fit PVC panels around sockets neatly
Prepare the wall as you would for the rest of the project. It should be dry, sound and reasonably flat. Remove flaky paint, loose wallpaper and protruding fixings. PVC panels can disguise tired décor, but they cannot correct a damp wall or a seriously uneven surface.
Apply panel adhesive in even beads or as directed for your chosen product. Keep adhesive well away from the socket box and the cut-out edge. Press the panel into position, working from one edge across the wall so it engages correctly with the previous panel or trim.
Once the panel is seated, bring the socket faceplate forwards through the opening and refit it using suitable screws. Do not overtighten. The faceplate should sit squarely against the panel, with no rocking movement and no bowing caused by pressure on the PVC. If it will not sit flat, remove it and investigate the cause rather than tightening the screws further.
Where the wall finish has become noticeably thicker, a box extension or longer fixing screws may be appropriate, but these must suit the existing electrical accessory and installation. This is where professional advice pays off. A neat feature wall is never worth compromising electrical safety.
For double sockets, fused spurs, switches and data outlets, use the same approach: isolate where necessary, measure from reliable reference edges, cut a controlled opening and make sure the finished accessory is firmly supported. Avoid placing a panel joint directly through the middle of an accessory whenever the layout allows.
Small details that prevent a messy finish
PVC expands and contracts slightly with changes in temperature. Leave the expansion allowance recommended for the panel system at perimeter edges, then conceal it with the correct trim. Around a socket itself, the faceplate generally covers the cut edge, so there is no need to force a tight, zero-gap cut that may distort the panel.
Do not run silicone around the faceplate to disguise a poor opening. It can make future electrical work harder, trap dirt and look untidy over time. A correctly sized cut and a square, secure faceplate are the better finish.
If you are fitting panels on a chimney breast or media-wall area, check for hidden cables before drilling or fixing. Use a cable detector where appropriate and avoid assumptions based on where the socket appears. Cables can run vertically or horizontally from electrical accessories.
PVC panels around kitchen and bathroom sockets
PVC panels are a practical choice where wipe-clean walls matter, particularly in kitchens, utility rooms and bathrooms. However, wet areas require extra care. Electrical accessories near water are subject to specific UK requirements, and ordinary sockets are not suitable in many bathroom locations.
Keep panel adhesive, sealant and moisture away from electrical connections. Where a socket is close to a sink, shower or bath, or where the wall shows signs of damp, speak to a qualified electrician before fitting. The panel may be straightforward; the location of the electrical point may not be.
In a kitchen, consider the route of splashback sealant and make sure it does not bridge onto the socket faceplate. You want a clean, wipeable wall, while still allowing the faceplate to be removed for inspection or replacement when needed.
Check the finish before restoring power
Before switching the circuit back on, inspect each accessory. The faceplate should be level, fully supported, firmly fixed and free from trapped panel material or adhesive. Check that no cables have been pinched and that the screws are secure without being overtightened.
Then restore power and test the socket or switch normally. If anything feels loose, looks uneven or does not operate as expected, isolate the circuit again and arrange electrical help. Home Hub Direct panels are designed to make a premium wall upgrade feel achievable, and taking care around sockets is what gives the finished project that confident, professional look.
A clean cut, a properly supported faceplate and a few extra minutes of checking are all it takes to make the practical parts of the room look as considered as the feature wall itself.