A media wall can look impressive in photos, but the difference between a good one and a great one is often what surrounds the screen. Acoustic panels for media walls bring texture, warmth and a more considered finish to the space where you watch films, play games and switch off at the end of the day. They can also help soften the hard, echo-prone feel that large TVs, bare walls and tiled or laminate floors can create.
The result is not a recording studio. It is a living room that feels calmer, more complete and far more expensive than the fitting process suggests.
Why acoustic panels suit media walls
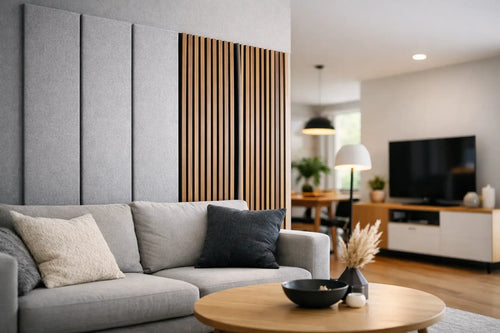
A TV mounted on a plain painted wall can feel flat, especially when it is the main focal point of the room. Slatted acoustic panels add depth behind the screen without demanding a full renovation. Their vertical lines naturally draw the eye upwards, making ceilings feel higher and helping a wide media wall look more balanced.
The wood-look slats also bring in the warmth that modern TVs, soundbars and electric fires can lack. Pair a darker finish with a black TV and fireplace for a bold, tailored look, or choose a lighter oak-style tone to brighten a smaller lounge. Either way, the panels give the technology a proper backdrop rather than leaving it to dominate the room.
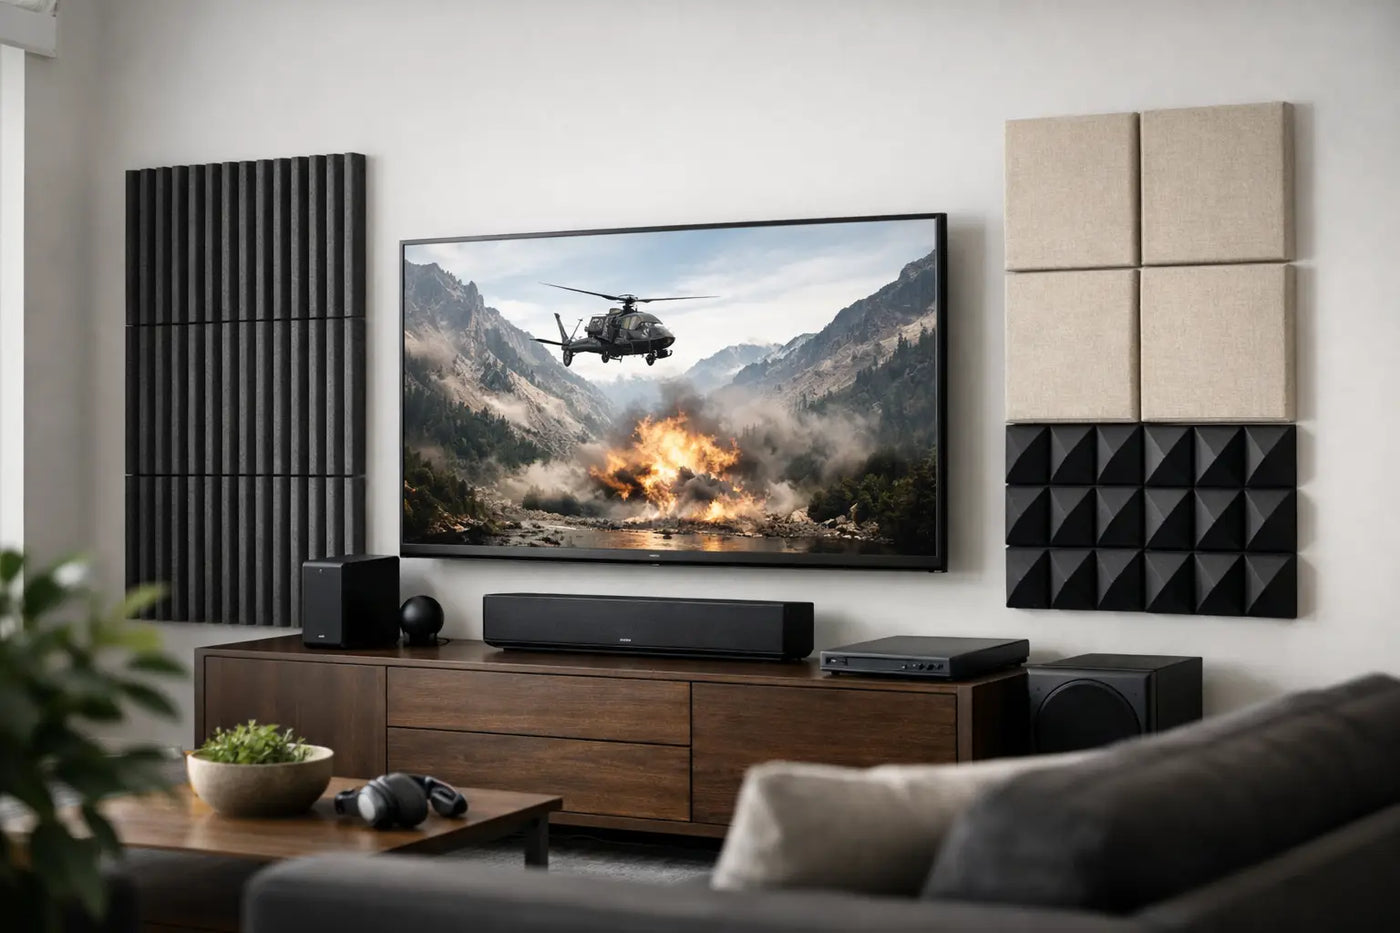
There is a practical benefit too. The felt backing and slatted surface can reduce some of the reflected sound that causes rooms to feel sharp or hollow. This is particularly welcome in open-plan homes, newly built properties and rooms with hard flooring. Panels will not fully soundproof a space or stop noise travelling through walls, but they can make everyday sound feel less harsh within the room.
What acoustic panels can and cannot do
It helps to choose panels for the right reasons. Acoustic slatted wall panels are designed to absorb and diffuse a degree of sound within a room. They can help reduce echo from conversations, television audio and music, especially when fitted over a generous section of wall.
Their effect depends on the room. A compact lounge with a rug, curtains and soft furnishings may need only a panelled media-wall area to feel more comfortable. A larger, minimally furnished space with lots of glass may benefit from panels across a wider wall, plus softer furnishings elsewhere.
They are not a replacement for specialist insulation if your priority is blocking noise from neighbours, traffic or another room. For that, the wall structure, insulation and gaps around doors all matter. Think of acoustic panels as a smart finish that improves atmosphere and visual impact, rather than a cure for serious noise transfer.
Choosing the right panel layout for your TV wall
The best layout usually starts with the width of the TV, not the width of the wall. A panelled section that extends beyond both sides of the screen creates a frame-like effect and stops the installation looking undersized. If you are adding a floating cabinet or an electric fire beneath, centre these elements first and build the panel layout around them.
For a clean, contemporary look, run panels from floor to ceiling behind the TV. This works especially well where the media wall is the room's main feature. It is also a simple way to make an ordinary chimney breast, alcove or boxed-out wall feel intentional.
A partial-height installation can be equally effective when you want a softer statement. Panels fitted from a cabinet top to the ceiling create a neat visual zone, while a narrow run in an alcove can make a smaller television area feel designed rather than improvised.
Consider cable management before fitting. Plan where power sockets, aerial leads, HDMI cables and soundbar wiring will sit. If cables will be hidden behind the panels, make sure connections remain accessible where needed. A professional-looking media wall is as much about what you cannot see as what you can.
Full-wall or feature section?
A full wall of slatted panels creates the biggest impact, but it is not always the best choice. In a small or dark room, covering every surface in a deep walnut-style finish can make the space feel enclosed. A central panelled section may give you the same premium focal point while keeping surrounding walls light and open.
In a large room, a wider panelled section can prevent a wall-mounted television from looking lost. Extend the design to include shelving, side units or a built-in fire surround if your layout allows. The aim is proportion, not simply adding more panels.
Match the finish to the room, not just the trend
Black and dark wood finishes work brilliantly with contemporary furniture, dark metal lighting and sleek electric fires. They bring drama and can make a large screen blend into the overall design. This is often a strong choice for cinema-style rooms or lounges with plenty of natural light.
Oak, light grey and softer wood tones feel more relaxed. They suit Scandi-inspired interiors, family living spaces and rooms where you want texture without making the wall too dominant. A lighter finish can also work well behind a television in a bedroom, where the overall mood should remain calm.
Before ordering, look at the undertones already in the room. Warm timber flooring and cream walls tend to sit comfortably with warmer panel finishes. Cooler grey flooring, black furniture and white walls can carry darker or more neutral tones. Samples, if available, are useful because lighting can change the appearance of a finish dramatically from morning to evening.
A simple fitting plan for a polished result
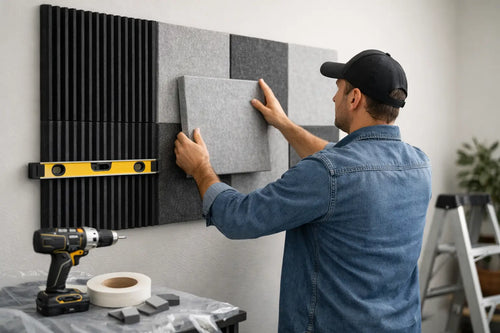
One of the main appeals of acoustic slatted panels is that they can be fitted as a DIY project. With careful measuring, suitable adhesive and a few basic tools, you can achieve a sharp result without the dust and disruption of major building work.
Start with a clean, dry and sound wall. Remove loose wallpaper, flaky paint and anything that will prevent the adhesive from bonding properly. Mark a level vertical line for the first panel. This first piece matters because every panel after it follows the same line.
Measure around sockets and switches carefully, then cut panels with the right blade for the material. Always check the fit before applying adhesive. If you are panelling around a TV bracket, install the bracket securely into the structural wall or suitable framework first. The panels are a decorative finish, not a surface intended to carry the television's weight.
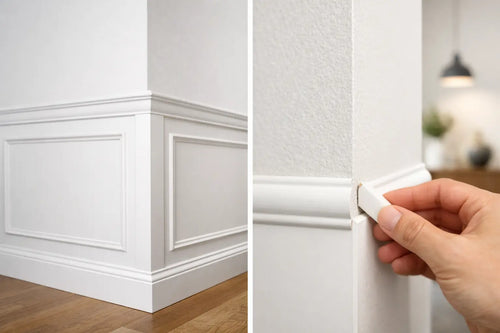
Use finishing trims where they suit the design, particularly along exposed edges. They give the installation a neat endpoint and can hide small cut edges. Take your time around corners, ceiling lines and cabinets. Those details are what make a DIY project look professionally finished.
Home Hub Direct supplies a free installation guide with every order, giving you clear support from planning through to the final panel.
Do you need panels behind an electric fire?
You can use acoustic panels as part of a media-wall design with an electric fire, but follow the fire manufacturer's clearance and installation instructions first. Heat output, ventilation requirements and the fire surround construction all need to be considered.
Do not assume every panel material is suitable immediately around a heat source. Create the required clearance, use an appropriate non-combustible surround where specified, and keep electrical work safe and accessible. If your project includes a built-in fire, this is the point where specialist advice may be worthwhile.
Make the whole wall feel finished
The panels are the visual anchor, but a few considered choices complete the look. A low floating TV unit keeps the floor clear and gives you space to conceal consoles and remotes. A soundbar mounted close to the TV makes the arrangement feel deliberate. Warm LED lighting behind a cabinet or within shelves can highlight the texture of the slats in the evening without overpowering the room.
Avoid overcrowding the panelled section with too many shelves, ornaments or competing colours. The slats already add movement and detail. Let them do their job, then add only the pieces that support how you use the room.
A well-planned media wall should make everyday living feel easier, not more complicated. Choose a panel finish you will enjoy beyond the latest trend, measure before you order and allow time for the finishing details. The reward is a room that feels quieter, warmer and ready for every film night ahead.