A bare wall can make even a well-furnished room feel flat - and sound it, too. Acoustic wall panels add the kind of warmth, texture and depth that turns a TV wall, bedroom or hallway into a considered feature, without committing to a disruptive renovation. They are a practical way to bring a premium, contemporary finish home while taking the edge off everyday echoes.
For many projects, the visual change is the main reason to choose them. The improvement in sound is a welcome extra. Understanding what panels can realistically do will help you choose the right wall, finish and fitting method from the start.
What acoustic wall panels do
Acoustic slatted panels combine evenly spaced decorative slats with a sound-absorbing felt backing. The slats create a clean linear look, while the felt helps absorb some sound waves that would otherwise bounce around hard surfaces such as plaster, glass, laminate flooring and large TVs.
That can make a living room feel less sharp during family film nights, help a home office feel more settled on calls, or reduce the hollow quality of a newly decorated bedroom. The effect is usually most noticeable in rooms with minimal soft furnishings and lots of open space.
They are not a substitute for proper soundproofing. If you can hear neighbours through a party wall, traffic through poor glazing or footsteps from the flat above, you may need structural work involving insulation, acoustic membranes or professional advice. Decorative acoustic panels improve the sound inside a room; they do not block all noise travelling between rooms.
That distinction matters. Choose panels for a calmer feel and a standout wall, rather than expecting a home cinema or recording-studio level of isolation.
Where acoustic wall panels work best
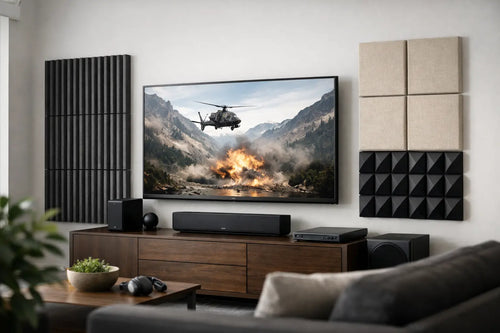
A full feature wall behind a television is an obvious choice, and for good reason. It gives a media wall a finished, high-end backdrop, softens the contrast of a black screen and can hide small wall imperfections. Run the panels from floor to ceiling for a confident architectural look, or use a centred section to frame the TV unit.
In bedrooms, panels work beautifully behind the bed. A slatted headboard wall adds warmth without taking up valuable floor space, particularly in smaller rooms. Choose a wood-look finish that complements bedside furniture rather than trying to match it exactly. A gentle contrast usually feels more intentional.
Hallways are another strong option. They are often narrow, plain and overlooked, yet they set the tone when you arrive home. A panelled section beside a console table, coat hooks or a bench can give the space character while making it feel more welcoming.
Home offices benefit from the same balance of form and function. Positioning panels behind a desk creates a smarter background for video calls and reduces the stark feel of a workspace built from hard surfaces. For landlords preparing a property to let, a single well-placed feature wall can also make listing photos feel more polished without redesigning every room.
Choose the finish for the room, not the trend
The best finish depends on the light, scale and existing colours in your space. Dark walnut-style tones create drama and work especially well in larger lounges, media walls and rooms with plenty of natural light. They can feel rich and cocooning, but covering every wall in a dark finish may make a compact room feel enclosed.
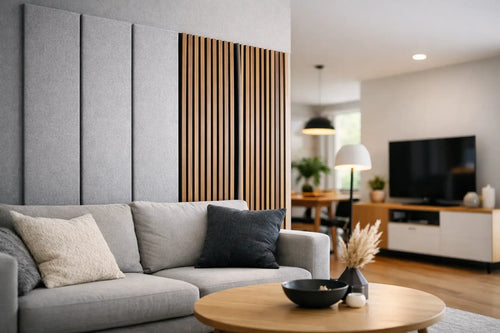
Lighter oak-style panels are an easy choice for bedrooms, hallways and smaller living areas. They bring in warmth while keeping the room open and relaxed. Pair them with off-white walls, soft grey furnishings and black or brushed-metal details for a clean modern contrast.
Before ordering, measure the wall carefully and think about where panel joins will fall. A symmetrical layout around a TV, fireplace or bed normally looks more professional than starting at one side and hoping the final cut works out. If the wall has sockets, switches or radiators, plan those cuts before fitting.
It is also worth considering the direction of the slats. Vertical panels make ceilings appear higher and suit most feature-wall projects. Horizontal installation can make a wide wall feel broader, but it is a bolder look and requires more care around joins and electrical fittings.
Measure before you buy
Start by measuring the height and width of the area you want to cover. Multiply them to find the wall area, then compare that figure with the coverage of your chosen panel. Allow for cuts, especially when working around alcoves, sockets or a wall-mounted TV.
Do not assume every wall is square. Measure in more than one place, particularly in older homes. If the height varies, use the largest measurement when planning your cuts. It is far easier to trim a panel neatly than to discover it falls short at the ceiling.
Think beyond the panels themselves. A refined finish often comes down to the details: matching trims at exposed edges, neat cuts around sockets and a considered plan for cables. If you are creating a media wall, decide where power leads, aerial cables and LED lighting will sit before the first panel goes up.
Fitting panels with confidence
One of the biggest advantages of this style of wall treatment is that it is achievable for capable DIYers. You do not need to plaster, grout or wait for coats of paint to dry. With a sound wall, accurate measurements and the right adhesive or fixings, the transformation can move quickly.
First, make sure the surface is clean, dry and reasonably level. Remove loose paint, dust and anything that could stop adhesive bonding properly. For uneven walls or installations where you need access behind the panels, battens and screws may be the better route. This can also create a small void that supports acoustic performance when used with suitable insulation.
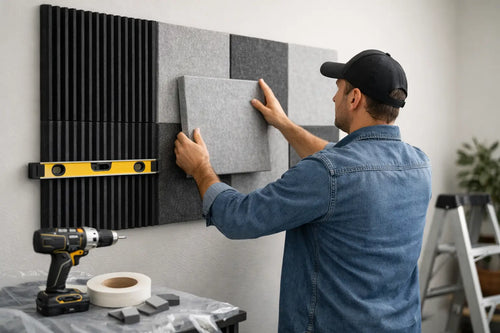
For a straightforward decorative feature wall, adhesive is often the simplest option. Apply it in accordance with the product guidance, press the panel firmly into position and check it is plumb before moving on. Begin from the most visible edge or centre point, depending on your planned layout. A spirit level is not optional here - a slightly crooked first panel will show across the whole wall.
Panels can generally be cut to size using appropriate tools, but take your time. Measure twice, mark clearly and make test cuts where possible. When cutting around sockets, isolate the electrical circuit first and use a qualified electrician if any wiring needs moving. Style should never come before safety.
Home Hub Direct includes a free installation guide with every order, giving you a clear starting point whether this is your first feature wall or your next weekend project.
Make the finished wall feel intentional
The panels are only part of the look. Lighting makes a noticeable difference, particularly on a dark finish. Warm LED strips along the edge of a media wall or behind a television can emphasise the slat texture without making the room feel harsh. Avoid overly cool white lighting, which can flatten the warmth of wood-look tones.
Keep furniture around the wall purposeful. A low TV unit, floating shelf or simple bedside tables allow the panels to remain the focal point. Too many small accessories can compete with the linear pattern. In a living room, softer elements such as curtains, rugs and cushions will complement the panels visually and help create a more comfortable acoustic balance.
For renters, check your tenancy agreement before fitting anything with adhesive or screws. Some landlords will welcome a tasteful upgrade, while others may require written permission or expect the wall to be returned to its original condition. A temporary approach or a smaller panelled section may be the sensible choice where flexibility matters.
A feature wall that earns its place
Acoustic panels are at their best when they solve more than one design problem. They can give a plain wall a focal point, make a media area look built-in and add softness to rooms dominated by hard finishes. Yet restraint counts: one strong panelled wall often has more impact than using the same finish everywhere.
Choose a space you use every day, measure it properly and let the finish work with the room rather than overpower it. A carefully fitted panelled wall is not just decoration - it is a simple upgrade that makes coming home feel that little bit better.